

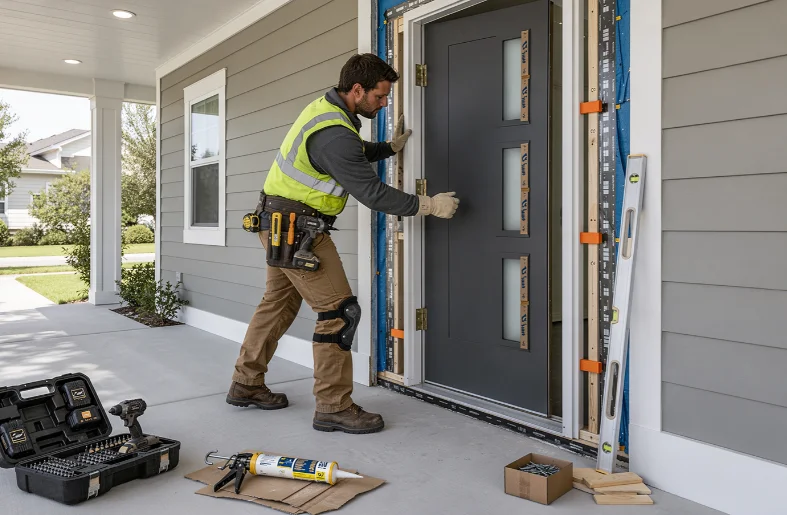
Exterior door installation requires accurate measuring, careful leveling, secure fastening, and thorough weatherproofing. A well-fitted entry helps block drafts, moisture, and unwanted movement around the frame. Homeowners also need to consider local codes, door weight, and the condition of the opening.
Direct answer: Exterior door installation starts with measuring the opening and removing the old frame. Next, prepare the sill, position the prehung unit, shim it level, and fasten it securely. Finish by insulating gaps, sealing the exterior, installing trim, and testing the door for smooth operation.
| Key point | What U.S. homeowners should know |
|---|---|
| Typical project | Replacing an existing entry with a prehung unit |
| DIY difficulty | Intermediate to advanced |
| Common timeline | Several hours for a straightforward replacement |
| Main tools | Level, drill, pry bar, tape measure, shims, caulk gun |
| Critical checks | Square opening, level sill, plumb jambs, even reveals |
| Weather protection | Sill pan, flashing, exterior sealant, proper insulation |
| Professional help | Recommended for structural damage, masonry changes, or difficult openings |
| Older homes | Pre-1978 painted surfaces may require lead-safe precautions |
What to Check Before Exterior Door Installation
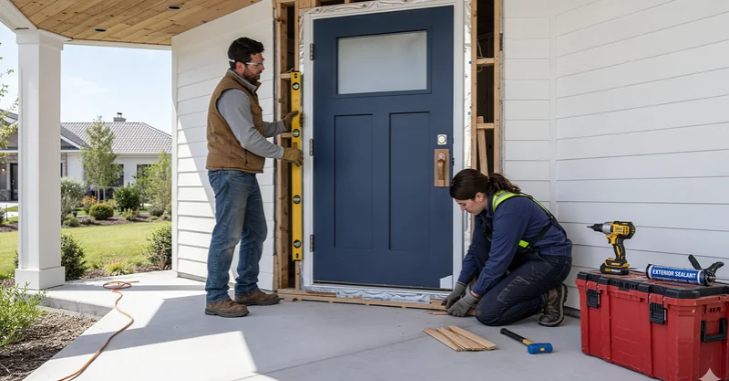
Start by Exterior Door Installation checking whether the existing opening is square, solid, and free from hidden water damage. Rot around the sill or framing can turn a simple replacement into a larger repair. Fixing those problems first protects the new unit from premature damage.
Measure the width near the top, middle, and bottom of the opening. Measure the height at several points as well. Use the smallest measurements when checking the replacement unit against the rough opening.
Confirm the handing and swing direction before buying anything. An inswing unit and an outswing unit require different planning around steps, landings, and interior space. Double-check the manufacturer’s sizing instructions before removing the existing entry.
Homeowners planning other upgrades can also browse Newsprest’s Home Improvement section. Coordinating several projects can reduce repeated prep work around an entryway. It can also help you plan trim, paint, lighting, and hardware together.
Tools and Materials You’ll Usually Need
A prehung replacement simplifies the job because the slab already sits inside its jamb. You still need enough tools to position and secure the assembly correctly. The manufacturer’s instructions should remain your primary installation reference.
You will usually need the following tools and materials.
- Tape measure.
- Four-foot level.
- Carpenter’s square.
- Drill and suitable bits.
- Pry bar.
- Hammer.
- Utility knife.
- Caulk gun.
- Wood or composite shims.
- Exterior-rated screws.
- Sill pan or approved flashing system.
- Flashing tape.
- Low-expansion window and door foam.
- Exterior-grade sealant.
- Interior and exterior trim.
- Safety glasses and work gloves.
Check the new unit for shipping damage before removing the existing one. Confirm its width, height, jamb depth, and swing direction. A mistake found before demolition is easier to solve.
How to Install a Prehung Entry Door in 9 Steps
1. Remove the Existing Door and Trim
Protect nearby floors before starting demolition. Remove the hinge pins or fasteners, then lift the old slab away with assistance. Exterior units can be heavy, so avoid handling a large one alone.
Remove interior casing carefully if you plan to reuse it. Cut old caulk before prying exterior trim away from the wall. Expose the jamb fasteners without causing unnecessary damage to surrounding finishes.
2. Remove the Old Frame
Cut or remove the fasteners holding the old jamb. Work slowly around siding, stucco, brick molding, or other exterior finishes. Pulling the frame aggressively can damage materials that are expensive to repair.
Clean loose caulk, nails, foam, and debris from the rough opening. Inspect the sill and framing for softness, staining, or decay. Repair damaged wood before installing the replacement.
3. Check the Rough Opening
Use a level to check the sill and each side of the opening. Measure diagonally in both directions to identify a badly out-of-square frame. Small differences can often be corrected with shims.
The opening must provide enough clearance for adjustment without leaving excessive gaps. Compare your measurements with the manufacturer’s required rough-opening dimensions. Never force an oversized assembly into the framing.
4. Prepare and Flash the Sill
Water management matters because the threshold sits in one of the doorway’s most exposed areas. Install the sill pan or flashing system specified by the manufacturer. Extend and lap flashing so water moves toward the exterior.
Dry-fit the unit before applying permanent sealant. This confirms the threshold sits correctly and the jamb has enough adjustment space. Remove the assembly after the fit looks correct.
5. Set the Prehung Unit in Place
Apply the recommended exterior sealant beneath the threshold and at specified contact points. Set the bottom of the assembly first, then tilt the top into position. Have another person steady it while you begin adjustments.
Center the frame inside the rough opening. Check the hinge-side jamb with a level before adding permanent fasteners. The quality of this adjustment affects nearly every later step.
6. Shim and Fasten the Jambs
Place shims behind each hinge location and near the latch area. Add other shims where the manufacturer requires support. Avoid bowing the jamb by tightening fasteners too aggressively.
Fasten through supported areas using approved screws. Recheck plumb after every major adjustment. Keep the gap between the slab and jamb consistent around the perimeter.
7. Test the Swing and Latch
Open and close the entry several times before finishing the wall. It should move freely without drifting, rubbing, or binding. The latch should meet the strike plate without lifting or pushing the slab.
Inspect the reveal along the top and sides. Uneven spacing often signals a jamb that needs further adjustment. Correct alignment now instead of hiding the problem with trim.
8. Insulate and Seal the Gaps
Fill the space between the jamb and framing with suitable low-expansion insulation. Standard expanding foam can exert too much pressure on a door frame. Follow the product and door manufacturer’s directions.
Seal the exterior against rain and moving air. Keep drainage paths open where the system requires them. Good sealing supports comfort without trapping water inside the assembly.
9. Install Trim and Perform Final Checks
Reinstall or replace interior casing after the unit operates correctly. Complete exterior trim and seal joints that require weather protection. Paint or finish exposed surfaces according to the manufacturer’s instructions.
Test the deadbolt and latch from both sides. Inspect weatherstripping for continuous contact around the closed slab. Make final adjustments before calling the project complete.
How Much Does Exterior Door Installation Cost?
Costs vary widely because the door, frame condition, hardware, labor, and surrounding construction all affect pricing. Angi reported a 2026 national average near $1,457, with most projects ranging from $547 to $2,374. Complex custom entries can cost substantially more than basic replacements.
A straightforward project can cost less when the existing opening remains usable. Reframing, sidelights, masonry work, premium materials, and new hardware raise the total. Homeowners should compare written estimates using the same project scope.
| Cost factor | Why it changes the price |
|---|---|
| Door material | Wood, fiberglass, steel, and specialty materials have different prices |
| Frame condition | Rot or damage requires repair before installation |
| Door configuration | Double doors and sidelights require more labor |
| Opening changes | Reframing or masonry work increases complexity |
| Hardware | Premium locks and smart hardware add material costs |
| Finishing | Painting, trim, and siding repairs add labor |
Budget-conscious homeowners may find useful planning ideas in Newsprest’s DIY home improvement savings guide. Buying during promotions may reduce material expenses for suitable projects. Never choose an incompatible unit only because it has a lower price.
DIY or Hire a Professional?
DIY installation makes the most sense when the existing rough opening is sound and correctly sized. You should also be comfortable checking level, plumb, square, and consistent reveals. Mistakes can create leaks, drafts, security problems, or difficult operation.
Professional help becomes more valuable when framing has water damage or structural problems. Masonry modifications and major opening changes also deserve experienced attention. Heavy custom units may require specialized handling and fastening methods.
A contractor can also help when local permit or code questions are unclear. Building rules vary by jurisdiction, even when communities use versions of model residential codes. Check requirements with your local building department before altering an opening.
U.S. Code and Safety Issues to Consider
Residential codes commonly address egress, landings, thresholds, and safe travel through required exits. Local jurisdictions may adopt different code editions or amendments. Your local building department has the final requirements for your property.
Homes built before 1978 deserve additional attention before disturbing painted trim or frames. The EPA’s Renovation, Repair and Painting guidance explains risks from lead-contaminated dust. Contractors performing covered work must follow applicable federal or authorized state requirements.
DIY homeowners should also use lead-safe practices when older painted surfaces may contain lead. Sanding, cutting, and demolition can spread contaminated dust through a home. Testing or professional assessment can help you choose the right precautions.
Common Installation Mistakes to Avoid
One frequent mistake is ordering the unit before measuring the opening in several places. Another is fastening the jamb before confirming it is plumb and square. Both problems can produce uneven gaps and poor operation.
Poor sill flashing creates a more serious long-term risk. Water entering beneath the threshold can damage framing before the problem becomes visible indoors. Follow the manufacturer’s flashing sequence rather than relying only on surface caulk.
Using too much expanding foam can also distort a jamb. Choose products labeled for windows and doors, then apply them as directed. More insulation does not help if it pushes the frame out of alignment.
For broader reading about weather-resistant building materials, Newsprest also covers durable gratings and fencing materials. Those products serve different applications, but the same planning principle applies. Exterior materials need to match their exposure, load, and maintenance requirements.
How to Tell Whether the Job Was Done Correctly
A properly fitted entry should open smoothly and stay where you leave it. The latch and deadbolt should operate without forcing the slab sideways. Weatherstripping should make even contact when the unit closes.
Look outside during daylight and inspect the perimeter. You should not see obvious gaps where air or water can enter. Exterior sealant should be continuous where required and neatly bonded to clean surfaces.
Check the threshold during the next heavy rain. Water should move away from the opening rather than collecting against the frame. Address leaks quickly before moisture reaches hidden framing.
Final Checklist Before You Finish
Before considering the project complete, confirm that every moving and weather-sealing component works properly. Check operation before paint or trim hides areas that might need adjustment. A few minutes of inspection can prevent repeated repairs.
Use this final checklist:
- Door swings freely without rubbing.
- Reveals are even around the slab.
- Deadbolt and latch operate smoothly.
- Jambs remain plumb and straight.
- Threshold feels solid underfoot.
- Weatherstripping contacts the slab evenly.
- Exterior flashing and sealant are complete.
- Insulation does not distort the frame.
- Interior and exterior trim are secure.
- Local inspection requirements are satisfied when applicable.
A successful replacement depends on preparation more than speed. Measure carefully, protect the opening from water, and keep checking alignment during fastening. If hidden damage appears, stop and repair the underlying problem before finishing.
Frequently Asked Questions
How long does exterior door installation take?
A straightforward prehung replacement can often be completed within one working day. Complicated framing repairs, masonry work, or custom entries may take longer. Allow extra time for trim, paint, sealant curing, and unexpected repairs.
Can a homeowner install an entry door without a contractor?
Yes, an experienced DIY homeowner can replace a straightforward prehung unit. Accurate measuring and careful jamb alignment are essential for a successful result. Hire professional help when structural, water, or code problems appear.
Should I replace the frame with the door?
Replacing the frame often makes sense when the jamb is damaged, rotten, warped, or poorly fitted. A prehung assembly also gives you matched components from the manufacturer. A sound existing frame may sometimes support a slab-only replacement.
What is the biggest cause of problems after installation?
Water intrusion and poor alignment create many avoidable problems. Incorrect flashing can damage concealed framing, while uneven jambs can cause binding. Careful preparation matters more than rushing to finish the trim
